Bill and get paid on an event
When to use this
Use this guide from acceptance through to closing the books: raising invoices against the accepted proposal, tracking what has been paid, and wrapping the event up financially.
The reconciliation strip
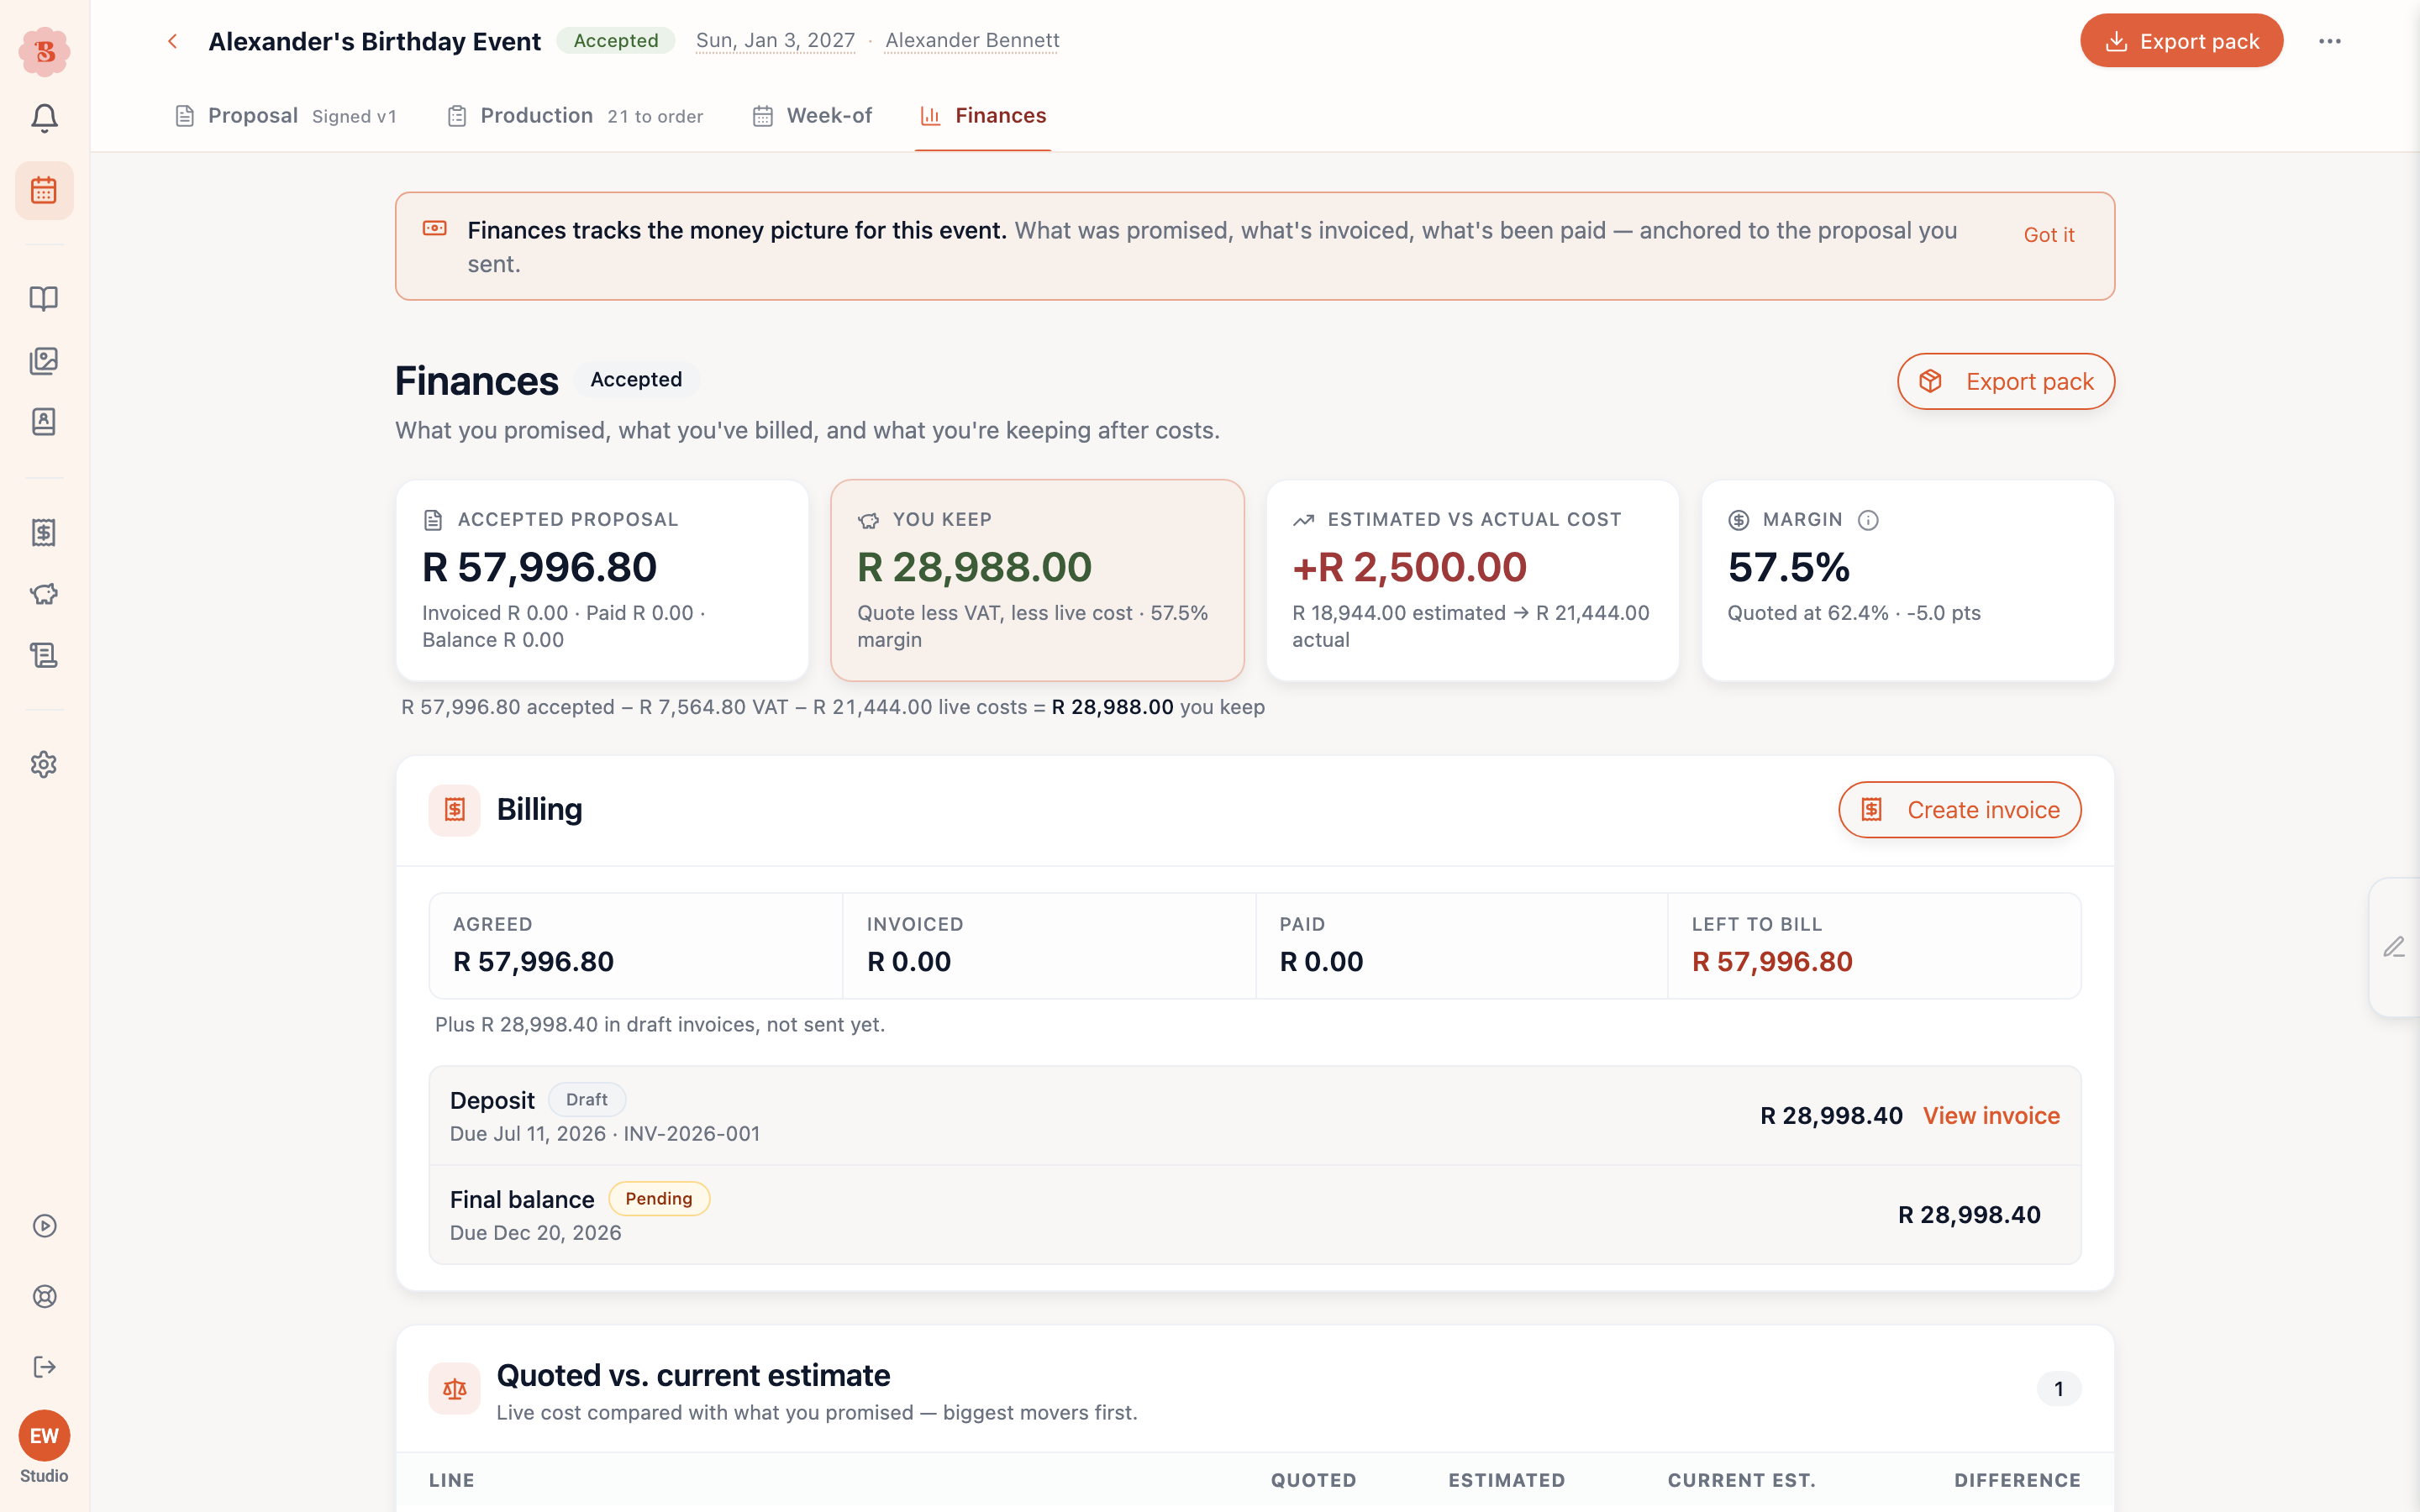
Once a proposal is accepted, the Billing section of the event’s Finances view opens with what has been paid out of the agreed total, and a strip that answers the money question at a glance: Agreed (the accepted proposal total), Invoiced, Paid, and Left to bill. The bar above the strip shows paid, invoiced and any discounts against the agreed total. If you have forgiven any amounts along the way, a Discounts figure appears too. Draft invoices are noted separately until they are actually sent, so the strip only ever counts what the client has been asked to pay.
Three things are worth knowing about how the strip counts:
- Paid is the money actually recorded against the invoices, not a figure worked back from the balance. If a payment record cannot be read exactly, Paid reads Unavailable rather than showing a guess.
- Voided invoices count towards nothing. They drop out of Invoiced, Paid, and Left to bill alike.
- Invoices in another currency are listed separately, under their own currency, with no conversion applied. While any of them exist, Left to bill is withheld, because amounts in different currencies cannot be compared.
When the payment schedule cannot be checked
If BloomBoard cannot verify the event’s payment schedule, the Billing section says so and offers Reload payment schedule. Your invoice totals stay correct while that alert is showing; it is only the matching of invoices to scheduled milestones that is unavailable. Reload, and the milestone rows come back.
The deposit, the moment a client accepts
When a client signs, BloomBoard drafts the deposit invoice from the first milestone of the payment schedule and shows an amber Proposal accepted banner on the proposal board with Review & send. Nothing goes to the client until you send it.
If you would rather not be in the loop, switch on Collect on acceptance on that first milestone, either in the proposal’s payment schedule before you send it or as your account default under Business → Payment schedule. The deposit invoice is then sent and emailed automatically the moment the client accepts, and the client’s signing page gains a Your payments panel with a Pay now button for it. The send flow reminds you of this with a line reading “The deposit will be invoiced automatically when your client accepts”.
Both the draft and the automatic send stand down when the event already carries a live invoice; voided or deleted invoices do not count. Two cases:
- You raised a deposit before the client signed. Nothing new is created and nothing is emailed, even with Collect on acceptance on. If that deposit is still a draft, the banner points at it with Review & send; if you already sent it, the milestone simply shows it.
- The client re-accepted a revised proposal whose earlier version was already invoiced. BloomBoard cannot tell how much of that money still applies, so it leaves the billing to you: no banner, nothing emailed. Check the Billing section and raise or send what is still owed.
Step-by-step walkthrough
Work down the milestone rows
Each milestone from the payment schedule has its own billing row. A pending milestone offers Create invoice; once generated, the row shows the linked invoice’s status, with View invoice, Record payment when it is payable, and Remind when it is overdue.
Remind opens the reminder email for that invoice: the client’s address (you can change it or add CC), a reminder subject and message you can edit, and the invoice PDF attached. Use Preview to see the email as your client will. The email links the client straight to the invoice’s payment page. If the client told you they paid by bank transfer, the reminder says so, so you can check your bank first. One reminder goes in any 24 hours, whether you sent it or an automatic payment reminder did; inside that time Send reminder waits and tells you when the next one can go.
If a milestone’s invoice was raised in another currency, or for a different amount, the row shows the invoice’s own amount and puts the scheduled amount underneath it. Both figures stay in their own currency; nothing is converted.
Create each invoice
The Create invoice sheet offers the paths that fit where the event stands: the next milestone, the remaining balance, everything itemized from the accepted proposal, or a blank invoice. Before acceptance, only a deposit or a blank invoice is available.
If your invoicing has drifted from the schedule, the sheet says so plainly and gives you exact-reconciling choices: collect the shortfall on this invoice, or keep the scheduled amount and record the difference as a discount. Either way, the numbers land honestly; nothing is silently over- or under-billed.
Send each invoice and share its payment page
Sending locks the invoice, assigns its number, and creates the client’s private payment page. Review and send on the invoice opens the same send screen as a proposal, with the ways your account can deliver it: Email the client where your account sends client email (compose the message, add CC, preview the exact email with the PDF attached), Copy the payment link to share the page yourself, or Download the PDF. On the page the client can pay by card when your provider is connected, or by bank transfer using your saved details. See Client payments for exactly what they see, and Set up online payments to connect a provider and enter bank details.
Record payments as they arrive
Record each payment against its invoice. Part payments show as partially paid; payments on an invoice outside the schedule are listed separately so milestones never flip status for the wrong reason.
Card payments made on the payment page record themselves; you never enter them. Bank transfers the client reports show in the invoice’s payments panel, on Today and in the Documents list. Choose It’s in my bank once the money reflects; the client gets a receipt when they have an email address. When you record any other payment with Record Payment, leave Email a receipt ticked to send the client one.
Payments made online through your payment link are marked Paid online and cannot be deleted; the way out is a refund. Use Refund on the payment to return some or all of it. The Payments card in the invoice’s payments panel then lists every refund attempt under that payment with its date, amount and status: Completed, Pending or Failed. Only completed refunds count towards the refunded total, a pending one is shown separately until the provider confirms it, and a failed attempt stays in the list so you can see it without opening your payment provider.
Review how the event performed
The What you keep summary on the right shows what the event leaves you after costs, with the subtraction written out underneath: the accepted total, less live costs, less tax, less any planner commission. After acceptance, the Cost check below Billing lists each line whose live cost has moved away from the cost you quoted, biggest changes first. The margin figures exclude tax, since tax is passed on rather than kept, and the same margin appears wherever the event is discussed.
Wrap up the event and close the books
When the event is delivered, move it to Completed on the Events board, or set the status when you edit the event. The Finances view then opens with a Wrap up this event card. Choose Start the wrap-up to confirm what the event really cost. The Wrap up event button on the proposal board opens the same wrap-up.
The wrap-up lists the costs in three groups:
- Supplier bills: one line for each supplier order on the event. Use Add a supplier bill for a bill that has no order.
- Team & labor: starts at your labor estimate.
- Extras: use Add an expense for anything else, such as parking.
Click an amount to change it. A line you leave untouched closes at the amount you planned, and the wrap-up saves as you go. You can also drop supplier invoices or receipts on Smart close-out at the top, or type what something cost, and BloomBoard drafts the lines for you to confirm. Each document uses one credit; typing is free.
When the figures look right, choose Close the books. The card then shows the true cost against what you planned, and on the Studio plan Analytics reports the event’s true cost instead of an estimate. If a bill arrives late, choose Reopen the books on the same card.
You can also ask the assistant “what did the Hart wedding really cost?” for planned against actual by supplier. Tell it what a supplier really charged, add an extra cost, attach a supplier bill in the chat for a Smart read (it uses one Smart close-out credit, after a card), and close or reopen the books (a card).
If the strip ever shows you have invoiced more than the accepted total, stop and review the invoices before sending anything else. The banner points you at the rows to check.