Set up your terms and conditions
When to use this
Use this page to put real terms behind your proposals: the conditions a client agrees to when they sign.
How terms work in BloomBoard
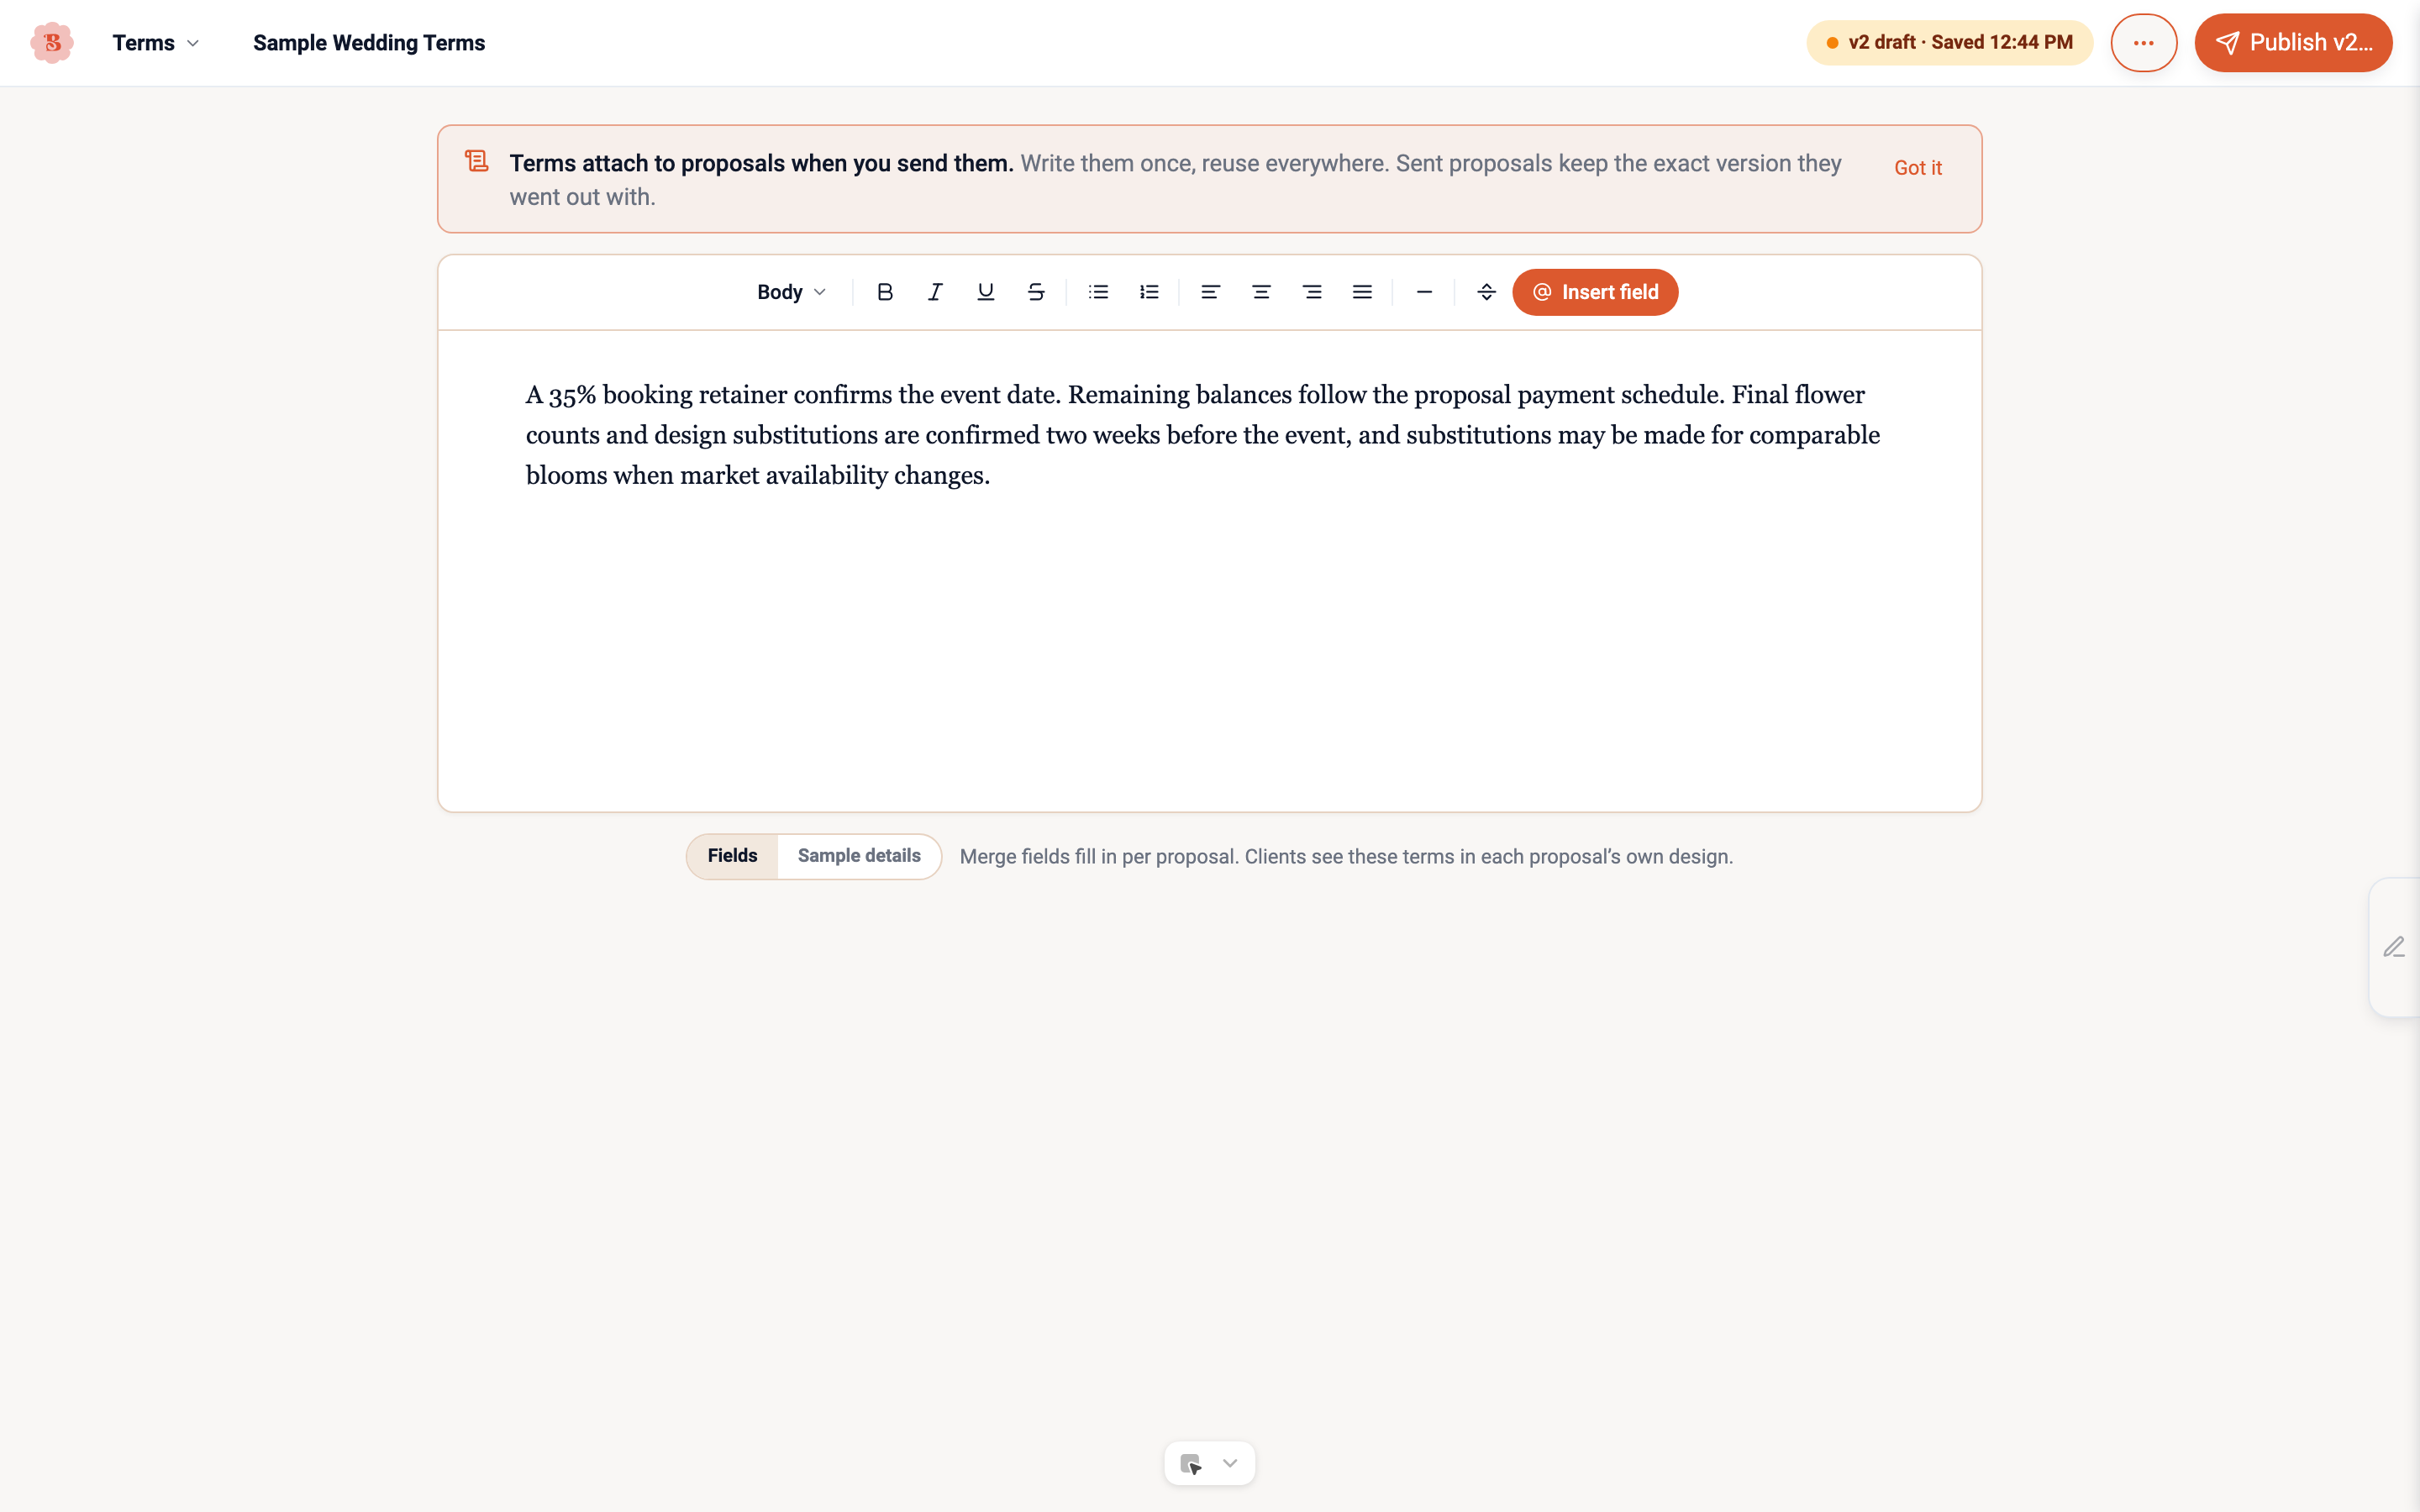
Terms in the navigation opens Terms Studio, where you write and design your terms documents. Each document keeps its versions. You work on a draft, then publish it, and the published version is what proposals get from then on. When a client signs, the exact version they saw stays with the proposal, so there is never a question about which terms applied.
Clients read the terms on their own terms page, which the proposal links to. That page shows the same pages as the client preview in the studio, and clients can download the terms as a PDF there. When a client signs, the signed copy that goes to the client and to you includes the terms as a PDF.
Step-by-step walkthrough
Open Terms Studio
Open Terms in the navigation. If you have no terms yet, choose Add new terms. You can paste or upload the terms you already send (see Bring in your existing terms), or choose Start with a blank page instead to write from scratch.
When you come back, Terms opens your most recent document. If you are not in the middle of a draft, your first visit in a browser tab asks what you would like to do: Add new terms, or Choose a document to open one of your saved documents. Later visits in the same tab go straight to the document. To start another document at any time, open the More menu (the three dots at the top right) and choose New document.
Write your terms
The studio has two panes. On the left, Your terms is the page you type on, and it saves as you type. On the right, Client preview shows the pages your client gets, with sample details filled in.
Start with your title, then your terms. Click any paragraph to show the formatting bar under it: bold, italic, a menu that turns the line into a heading, alignment, bullet and numbered lists, a page break, and Insert field. Choose Done to hide the bar. You can also type / for headings, lists and fields. Headings become your client’s table of contents.
To rename the document, click its name in the top bar and type.
Add merge fields
Merge fields drop event and studio details into the text, such as the client name or the event date, so one document serves every job. Choose Insert field on the formatting bar and pick a field, or type / and choose one.
In the client preview, client and event fields show example values. Your studio name, email and phone come from your account settings, so they read exactly as a client will see them. A studio detail that reads “(not set)” is missing from your settings.
Design the pages
The rail on the left styles this document. Colors sets the paper, the headings and the ink. Header and footer sets the logo in the header, the footer text and the page numbers, which print in the PDF only. Logo replaces the logo, removes it, or changes its size.
Your choices apply to this document only. A document starts from your brand kit, and your brand kit stays as it is.
To see only the client’s pages, choose Preview in the top bar. Choose Back to editing to return.
Publish
When the document reads right, choose Publish terms. BloomBoard saves your last changes, then shows what will happen: the new version becomes your live terms, proposals with these terms get it when you send them, and signed proposals keep the version they signed. Choose Publish v1 (or the next version number) to confirm. Publishing takes a few seconds.
Publish terms stays grayed out until you change something. The publish screen also has a Set as default box, which is ticked when you have no default terms yet.
Choose default terms
Open the More menu and choose Set as default. Every new proposal then starts with these terms. You can still change or remove them on any proposal, and proposals you have already started keep the terms they have. The document shows a Default tag in Terms Studio and in the proposal’s Terms section.
To stop, choose Remove as default. Only a published document can be your default: until you publish, the menu says “Publish these terms first”. Archiving the default document also removes it as your default.
Update over time
To change published terms, start typing. Your first change starts a new draft, such as v2 draft, in place. The live version keeps serving proposals until you publish the new one, and nothing already sent or signed changes. To throw a draft away, choose Discard draft… in the More menu.
History in the More menu lists every version, with the date it was published and the proposals still waiting for a signature on it. Choose a version, such as View v1, to read it. Back to draft or Back to current returns you. Back, at the top left, takes you to the page you came from, even after you open History or an older version.
If the same document is open in two tabs, the second tab to change it shows Changed in another tab · Reload, and Publish terms reads Reload to continue. Reload that tab before you go on.
To retire a document, choose Archive document… in the More menu. It leaves your library and cannot be added to new proposals. Sent and signed proposals keep the terms they already have.
On a phone
On a phone, Terms Studio shows the client preview of your terms, under a note that reads Best on a larger screen. Tap the document name at the top to switch to another document. Tap History to see your versions, choose one such as View v1 to read it, then tap Back to current (or Back to draft) to return. Writing, publishing, colors, the header and footer, and new documents need a laptop or tablet. If you have no terms yet, a phone shows You have no terms yet.
Terms on proposals
Each proposal has a Terms section. Before you send, it shows the document the proposal will use. View opens that document in Terms Studio, and Change picks another document or Send without terms. If you have default terms, a new proposal starts with them, marked Default.
Once the proposal is sent, the section reads Terms · Pinned at send, with the document, its version and the date it was pinned. View as client opens the exact terms page your client sees. If you publish a newer version later, the section says so, for example v2 published since, and the proposal keeps the version it was sent with.
A draft made before your terms were published has no terms until you attach them: choose Change in its Terms section, or ask the assistant to attach them.
A proposal can go out without terms. If your business depends on conditions, set up your terms before the first real send.
Terms on your proposal
Your full terms do not print inside the proposal. The proposal’s agreement page, where your client signs, names your terms and links to your client’s own terms page:
- Online, the name is a link to that page.
- On paper and in the PDF, the agreement page prints the address beside a code that reads Scan to read the terms.
- When your client signs, the signed copy that goes to them and to you includes the terms as their own PDF.
On the terms page, your client reads the same pages as the client preview in Terms Studio, and can download them as a PDF.
Special conditions
Special conditions are extra rules for one event, such as access times at the venue, a rule about candles, or your banking details. They print on the agreement page under the heading Special conditions for this event, above the signature, and your client signs them with the proposal.
- Open the event’s proposal and scroll to its Terms section.
- Select Add special conditions and type them. They save as you type.
Special conditions are frozen when you send, like the rest of the proposal. To change them after sending, make a revision. The assistant can also write them on a draft for you.
”Terms not available”
The terms page reads Terms not available when:
- the proposal is still a draft: the page opens once the proposal is sent,
- or the proposal has no terms attached: attach them in its Terms section and send a revision.
To check your terms before sending, use the client preview in Terms Studio, or View as client once the proposal is sent. A withdrawn proposal’s terms page reads Proposal withdrawn, with a link to the replacement’s terms when there is one.